
Since the dawn of time (or at least since the dawn of C) K&R adherents and Allman initiates have fought over whether the initial brace should trail at the end of the initialization or be on its own line. Ask a dozen engineers and you’ll likely get 13 opinions about how code should be formatted. Wars have been fought over less. The only things everyone agrees on are 1)that everybody else’s code is ugly and 2) the only thing worse than ugly formatting is inconsistent formatting. Thus the equally loved and hated introduction of coding standards.
At SciTools, as with many small companies, our coding standards have slowly formalized over the years. When we first started writing Understand, every engineer worked in their own code and had full control over how they formatted it, but as the years passed and new engineers came and went those boundaries started to disappear and some files started to get quite messy. Eventually, our team leads decided we needed to standardize on a few things and now we have a formal (if small) coding standard.

Photo by Alice Dietrich
Now our team tests our coding standard as part of our Continuous Integration(CI) process, and it was pretty easy to set up with Understand. Each time an engineer does a git commit we test that their changes build on all of our supported platforms, and then we test that they are adhering to our internal coding guidelines using CodeCheck. We use Jenkins to manage this. Here’s a brief walkthrough of our Jenkins setup with Understand and Codecheck, hopefully, it can help you with yours.
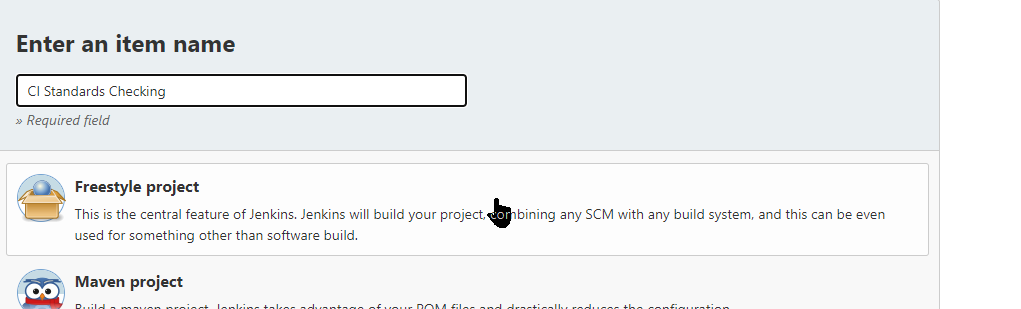
First, we set up our project as a Freestyle project
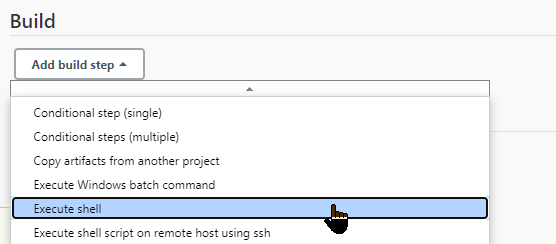
Once you’ve configured the triggers, version control and build environment for your project, select Execute Shell (or batch command on Windows)
And here’s the code we’re calling in the shell.
#!/bin/bash -x
UNDEXE=$WORKSPACE/bin/macosx/und
PROJDB=$WORKSPACE/src/understand/understand-macosx.undGITREV=$(git rev-parse HEAD)
$UNDEXE -db $PROJDB analyze -changed
$UNDEXE -db $PROJDB codecheck -exitstatus -showexcluded -htmlsnippets -showdetaillog -flattentree -gitfiles $GITREV SciTools $WORKSPACE/codecheck_output
We’ll walk through each step and explain it.
#!/bin/bash -x
The -x after the bash instruction outputs the commands being run in addition to the output. This is useful for debugging.
UNDEXE=$WORKSPACE/bin/macosx/und
This sets the location of the und executable. If you aren’t familiar with und, it lets you access many of Understand’s features from the command line – this support article is a great place to learn about it.
PROJDB=$WORKSPACE/src/understand/understand-macosx.und
And this is the location of our Understand project directory. Since this Understand project is the source code for Understand this might be a little confusing. Just point it at your project, e.g. myProject.und
GITREV=$(git rev-parse HEAD)
Our goal here is to look at the changes that were done in the last commit, so this step gives us the revision number of the last commit
$UNDEXE -db $PROJDB analyze -changed
This script assumes you already have an Understand project built, so we’re just going to analyze any files that have changed in it to make sure it is up to date.
$UNDEXE -db $PROJDB codecheck -exitstatus -showexcluded -htmlsnippets -showdetaillog -flattentree -gitfiles $GITREV SciTools $WORKSPACE/codecheck_output
And finally, the last but most important line of the shell script. This command runs CodeCheck against the project. CodeCheck has a lot of command-line options available to it which you can see by running und help codecheck, but here’s a brief overview of the ones we are using
-exitstatus Return a not zero value if there are violations reported, i.e. fail the Jenkins job
-showexcluded In our case we are interested in seeing the violations surrounding the modified areas of the code so show them as well
-htmlsnippets Save the output as an html folder that include a few lines of code with each violation
-showdetaillog Add extra details to the Jenkins output for debugging
-flattentree Show the full file name for each file, don’t build a tree
-gitfiles Here we specify the revision to look at. Understand will get the files and lines modified in that commit and focus the CodeCheck inspection there.
SciTools is the name of our CodeCheck Configuration, specify whatever configuration you’ve created in CodeCheck
codecheck_output Is the output directory where our results will be saved.
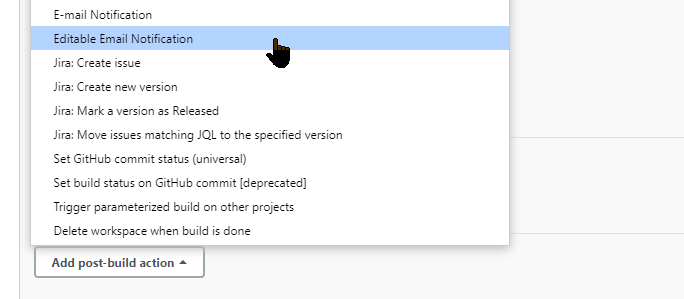
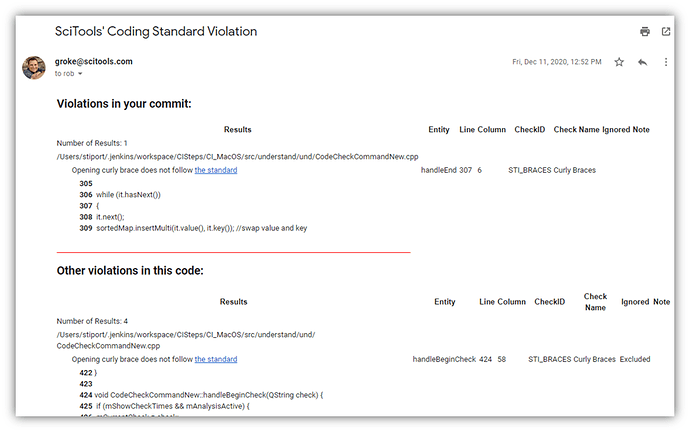
There are several files created, but the one we care about for this is called pages/intro.html and we’re going to email that file to the engineer if there are violations. We use a base Jenkins plugin called Email Extension that lets us specify extra details about the email, including embedding files.
So we add the email as a post-build action
We’re happy with the defaults for notifying the engineer that did the commit, and we just change the Subject and Body to include the file
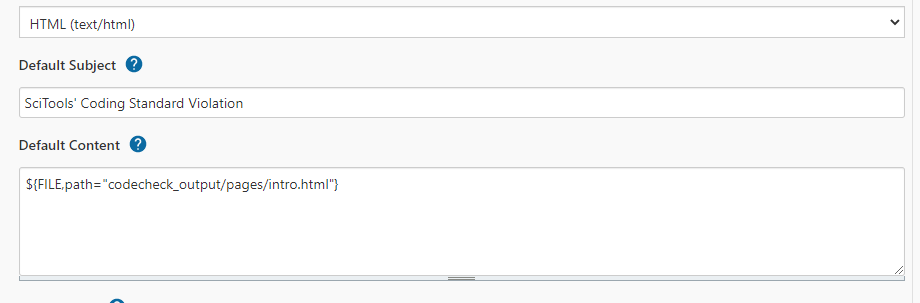
And that’s it. Now, whenever one of our engineers checks in a commit that doesn’t follow our coding standard that will get an email looking like this:
Now you can set up your own standard! Let us know if you get stuck or have any questions – you can always reach us at [email protected]