All software has bugs. It’s an old adage that hardly needs to be repeated. Anybody who has spent time developing software knows that defects are bound to crop up, no matter how meticulous the planning, design, and implementation may have been. What’s more, they continue to be introduced throughout the lifetime of a system.
There are a number of reference works available on the topic of debugging. Many of them focus on specific languages, APIs, or debugging tools. My favorite is Debugging: The 9 Indispensable Rules for Finding Even the Most Elusive Software and Hardware Problems by David J Agans. It uses anecdotes taken from real-world experience to illustrate a set of rules salient to the process of debugging any complex system. It deserves a place on any developer’s bookshelf.
Over the years, I’ve come to think of the process of debugging as essentially equivalent to the scientific method. It’s not a formal or rigid process, but rather a set of principles that apply equally well to debugging as they do to scientific inquiry.
Start with the observation of a defect
Some bugs are easy to observe. You see it yourself, or a user sends a report with step-by-step instructions on how to recreate it. However, all too often, replicating the bug is where much of the actual effort lies. Some bugs can be observed only intermittently or in specific environments. Sometimes the observer’s perception of the bug can be faulty. Sometimes we jump to conclusions and test the wrong thing. In these cases, it may be necessary to iterate the process multiple times, first just to ensure that you’re able to observe the bug. In all cases recreating the bug is absolutely essential.
Next, it’s important to do your research
User reports frequently indicate a regression in the form of “build X broke feature Y” or “I can no longer do Y”. In these cases, knowing what changed in build X is important not only for finding the cause of the bug, but proposing a fix later. The fix has to be made in the context of the change that introduced the regression. Otherwise, there’s a risk of getting caught in a cycle of competing “fixes”.
Design documents, conversations with colleagues, user communications, and bug trackers are all good ways to understand the history of how your software evolves. The best resource is the most authoritative one, your SCM system and the tools you use to understand it. I’m partial to our free GitAhead tool for this purpose.
Continue to refer back to the information gleaned in your research as you form and test hypotheses about the bug.
Form a hypotheses about what is broken and why
The essence of virtually all bugs is the system entering into an unexpected state. Debugging is all about identifying the bad state and what led to it. If you’re lucky enough to have a crash log or you’re able to reproduce a crash in a debugger, this might be immediately apparent. Things like null pointer dereference, division by zero, and integer overflow fall into this category. They are invalid states by definition.
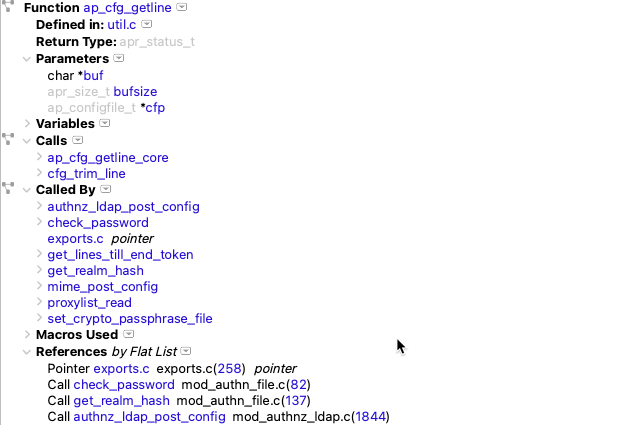
In more complicated cases the invalid state can be hard to pin down. It’s there in the code somewhere, but where to start looking? Finding the entry point always requires some sort of intuitive leap. But once you’re in the code, a tool like Understand becomes indispensable. An appropriately set up Understand project knows all of the important connections that constitute the state of the system. These connections include call trees, all of the places where data is used and set, and how data is passed between functions.
It’s important to note that looking comes before leaping. There’s a tendency to jump right into the debugger and start stepping. Much time is wasted and incorrect conclusions are drawn from not knowing where to look, and failure to understand what you’re seeing. This can be avoided by first learning the difference between the expected and exceptional states.
Forming a hypothesis about what is broken means saying to yourself something like, “I think variable X here should have value Y, but instead it probably has value Z.” When you’re able to formulate such a proposition, not only do you have something that you can test, you also understand something about how the invalid state can lead to the observed buggy behavior. The hypothesis explains the observed behavior.
After you have a hypothesis about the invalid state that causes the bug, it may be time to move on to the next step and put it to the test. After all, debugging, like the scientific method, is only conceptually a step-by-step process. In reality, it’s iterative and interleaved. The outcome of any step might prompt you to go back to revisit any of the previous steps.
After verifying that your system enters into a broken state, the next logical question becomes, how did it get into that state? What is the sequence of events that lead up to the bug? Start to form more hypotheses by going back to the code. This, again, is where Understand’s cross-referencing shines. Look at all of the call sites of the broken function. How do they differ from each other? Does the path through the broken stack trace do something different from the other paths? Look at where data is initialized, set, and modified. Can you come up with a path where data gets left unset or gets reset to an invalid value? I’ll provide some concrete examples of how I use Understand to answer these questions in a follow-up post.
Design experiments to test your hypothesis
Notice the rather pedantic wording, “design experiments” instead of just “test your hypothesis”. It’s meant to emphasize that experimental evidence in debugging is subject to the same pitfalls as more traditional scientific experiments. It’s possible to test the wrong thing, seek out the desired or expected result, or even completely misinterpret the results through carelessness or unconscious bias. This happens to everybody. Sometimes we don’t discover our error until after a “fix” is released to the user.
Establish a baseline and build controls into your experiments. For example, if your experimental evidence consists of debug statements, do a control run before changing any variables. Save the control output to compare with subsequent experimental runs. This is obvious, but it’s easy to end up with debug output and wonder, “wait, is this really different from before?”
Change one variable at a time. Again, this is obvious. But, again, I find myself falling into this trap. When you start with a reasonable hypothesis about what will happen when you make a change and vary one thing at a time, you can be reasonably confident that you don’t misinterpret a positive result.
Form conclusions
Problems don’t magically disappear. Neither are cosmic rays a satisfactory explanation for erratic or otherwise unexplainable behavior. So how do you know when you’ve really gotten to the root of a problem? It isn’t always possible to know with full certainty, but when you have a chain of evidence that starts with a plausible hypothesis connecting all the way through to an expected outcome, that’s when you gain the most confidence.
Sometimes it’s necessary to settle for weaker outcomes, either because all avenues of exploration have been exhausted or because further expenditure of effort is simply unjustified. It all depends on the severity of the failure and the cost you’re willing to invest. These weaker outcomes may include things like not fully understanding or reproducing the bug, but encountering related inconsistent behavior that can be fixed at little risk. Whatever the conclusion, it informs how you ultimately choose to resolve the issue.
Propose a resolution
Some solutions become obvious once you’ve managed to fully understand a bug. Some defects are bugs in the design and require a reexamination of the design of the whole system. Most bugs fall somewhere in between these extremes. In any case, proposing a solution usually involves another iteration of the process. Form a hypothesis about what changes will fix the problem, test the fix, etc.
Peer review and independent verification of results are as important to debugging as they are to scientific inquiry. Defending your conclusions to a colleague helps to solidify them in your understanding and exposes potential holes in your reasoning. The end-user is the ultimate arbiter of the defect resolution. Once you’re able to finally close the loop with them and they verify that the problem has been fixed, you’re done with the bug … at least until the next one crops up.


